
 The “Glossy Table effect” has been around for awhile now and many credit Apple for its popularity. It remains a good way of suggesting efficacy and giving a boring isolated product shot some visual interest. If there’s a plugin for this effect (That Works!), please reply and I will pay any amount of money. Unfortunately, the parameters are I think a bit complex for this to be automated. The only automated methods I’ve seen only work on objects that have a flat bottom on a straight horizon (Like a box or rectangular photo).
There’s lots of ways of doing this right and a lot of ways of doing it wrong (see this example by Pepsi). The Following is a step-by-step process of my tried & true technique. The example is for a company that I freelance for (Done in Photoshop CS5).
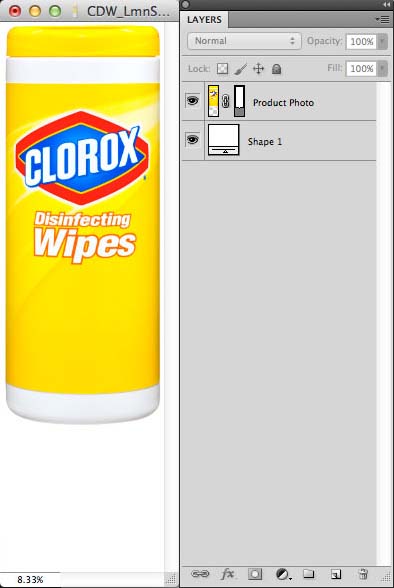
STEP 1: Start with a Hi-Rez, Image that is either clipped or masked.
It’s better to be safe … than have to redo it later. If your only intention is to use this for the web, than 800 px @72 dpi should be adequate. Adjust your canvas size to accomodate the reflection and fill your background with white. Having a background isn’t totally necessary, but it will help later on determining the proper opacity (Tip: I generally use a shape layer for my background so if I ever resize my canvas, I won’t need to “refill” it).
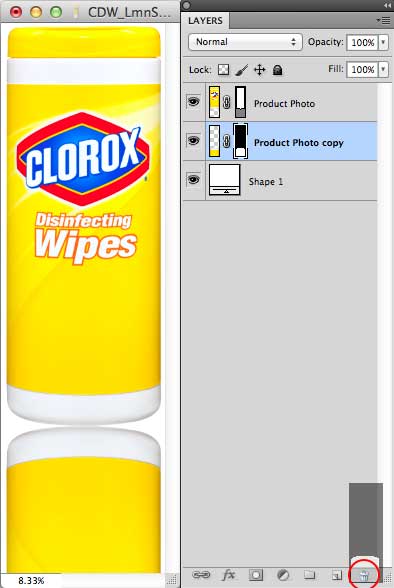
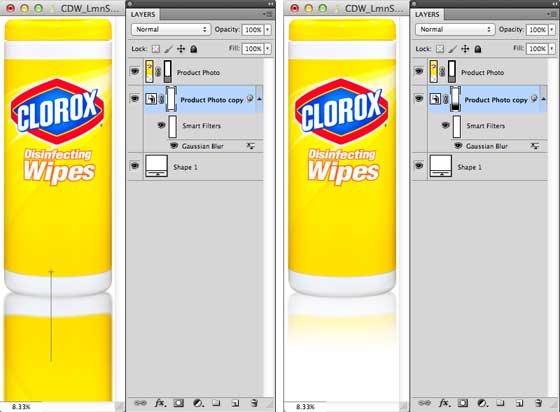
STEP 2: Reflect the image Vertically
Duplicate the Product Photo layer and “reflect” it along the X/Horizontal Axis through the Edit/Transform/Flip Vertical menu item. Move the layer down so that it is tangent to the botton of the product image. Reorder the layer if necessary. Rasterize this reflection layer with the Right-Click/Rasterizing Layer command. In this example, because the image has a clipping-path, I’ll need to delete the layer mask that is created. You can do this by dragging it to the trash icon in the Layers palette. Photoshop will prompt you: “Apply mask to layer before removing?”. Click “Apply“.
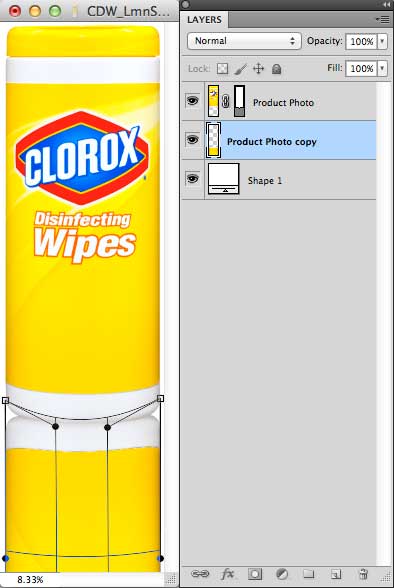
STEP 3: Warp the Reflection Layer
Because the product has a concave bottom, I’ll need to warp the reflection layer to make it look realistic. Select: Edit/Transform/Warp and Photoshop will create a vector grid with handles that you will use to simulate the appropriate amount of distortion. Pull the outer handles up in this case (or whatever is appropriate for your image). Commit these changes by hitting Enter.
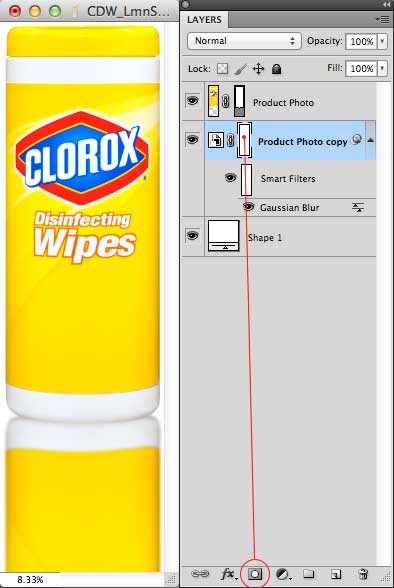
STEP 4: Diffuse the Reflection
Reflections are never as sharp as the original (unless placed on a mirror) so blurring the reflection will give it a more accurate “diffused” look. Here’s where I would consider converting the refection layer into a smart object as using any blur effect is “destructive” and thus cannot be altered after your document has been closed. Do this by right-clicking/Convert to Smart Object. Create the diffused appearance by using the Filter/Blur/Gaussian Blur effect. The amount of blur you apply will of course depend on the resolution of your image. Add a layer mask to the reflection layer.
Step 4
STEP5: Taper the Reflection
“Reset” your foreground/background palette pair to black & white with the “D” key. Make sure your layer mask is selected and then select the Gradient tool (G). Draw a gradient top-to-bottom starting just above the virtual horizon and release it wherever you’d like the taper to end. You can keep repeating this step until it “looks right”.
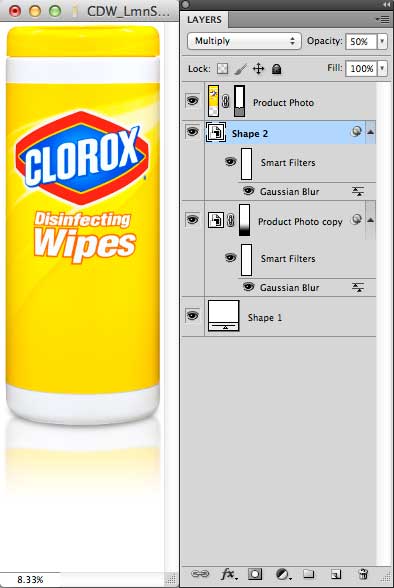
STEP 6: Add a Shadow
The final step to making this look like a realistic refection is adding a drop shadow to the product image to make it appear as if it is resting on something. There are several ways of doing this depending on the source image. Adding a drop shadow effect to the product image is one method but the shadow may creep a bit outside the image. In this example, I created a black ellipse shape layer, converted it to a smart object and applied a gaussian blur effect to it. I then applied a multiply to this layer and adjusted the opacity until I was visually satisfied.
And your done! I may consider deleted the background layer and collecting all the layers into a final, appropriately named smart object so it can be nimbly resized and included in my comp.


nicely done!
Good technique!
Thanks for the tutorial Rob, is there any chance you could extend it slightly and explain the technique used for subtle gradient line behind the product which gives depth to the image. If this isn’t possible do you know the name of this technique as I havent had any luck searching for a tutorial so far.
Hey Mike, thanks for “tuning in”. I think you’re referencing the horizon line? This can be accomplished with a shape layer/gradient overlay/layer mask combination. I’ll see if I can add this later in the week but if you’re in a hurry, I can email you the source files. Contact me.
Would it be possible to get a copy of this too?
great points altogether, you just gained a new reader. What would you recommend in regards to
your submit that you just made some days in the past? Any certain?
These are genuinely wonderful ideas in concerning blogging.
You have touched some pleasant points here. Any way keep up wrinting.
Feel free to surf to my web site google play gift card Generator
Okay clear Tutorial, Thank to rariasjr.com
This is a great tip particularly to those fresh to the blogosphere.
Brief but very precise info… Many thanks for sharing this
one. A must read post!
Great Tutorial! Simple and easy as all of your tips
Excellent tutorial for product reflection glossy table effect in photoshop. Such a great information when I saw your blog. Thank you so much for share this post.